Posts

Last Activity in Tioman Island

Image
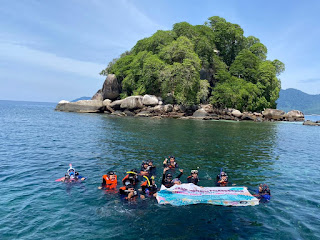
 T he last activity that we do at Tioman Island. We do our program at Tioman Island, the name of our program is "Let's Go Green " @ Kampung Genting, Pulau Tioman. We had a collaboration with Sorta Mat Stella Scuba Dive Centre to doing a CSR program. The objective of this program is to make people aware of the importance of keeping our Sea clean to prevent any of the sea creatures from eating it and it will harm them.  These are the things that can harm our ocean life, by doing this program we can spread awareness among the people that came to snorkeling here. Here is the place where we store the collected bottles. We gave token as our symbol of thank you and gratitude to the Sorta Mat Stella Scuba Dive Centre to keep it as a memory. That's is the end of our activity in Tioman Island. I hope our awareness will keep the ocean clean.
Other Activities in Tioman Island

Image
The second activity that we have done at Tioman Island. The activities that we do are snorkeling. It is a must-do activity when you have arrived at Tioman Island not only it have nice clear water but also has the same level as the one in other countries. A good whether make a day better for us to snorkeling. We see a school of fish and a lot of sea habitats.  

Activities that we do in Tioman Island

Image
   I want to share what are we doing at Tioman Island Here is some of the activities that we do at Tioman Island walk around the Island itself to see its beautifulness and how amazing this Island is. Not only we can walk around the Island we also can see how people live over their and how blue is the water is. That's it for the first activity now we moving on to the second activities that we do at Tioman Island

Interpretive media at Tioman Island

Image
  Hello, today i want to share interpretive media that been used in our Tioman Island Trip Personal interpretation is when visitors interact with someone face to faces such as during a guided walk or talk, or through a live performance or presentation from artists, actors, and activity and workshop leaders.  • Printed and graphic interpretation include leaflets, publications, trail guides, indoor and outdoor panels, and exhibitions.  • On-site interpretation includes 2D and 3D installations such as seating, sculpture, and specially designed waymarking.  • Electronic interpretation covers a wide range of computer and audio based material including websites, audio guides, podcasts, interactive screens, and CD-ROMs.

How To Add Gadget On Your Blog

Image
After that you need to press the Add Gadget Option and pick whatever gadget that you want to share to people.  As we can here their is over 26 gadget that you can choose from to make an appeared at your blog. So I want to teach you. I'll pick the Image gadget then proceed  After that you just press save then your gadget will appeared on your blog if you want to put not only on the sidebar you can move to other place also just drag it. That's for picture so i want to show how to add clock to your blog like mine. First thing first you need to add the HTML gadget first  As you can see you need to add the title and for the HTML code you I suggest using this website www.clocklink.com. Copy the HTML and your are done !!! So that's it from me Thank You and Happy Blogging :D

Add pages to your blog

Image
  Important : You can't use specific posts as pages. You can create pages for consistent content like “About” or “Contact.” Pages can show up as tabs at the top of your blog or as links on the side. Step 1: Show your pages Sign in to Blogger . In the top left, select a blog. From the menu on the left, click Layout. In the section you want your pages to show, click Add a Gadget. In the window, next to "Pages", click Add  . Set your settings and click Save. To save the arrangement, in the bottom right, click Save  . Tip: To change where your page shows up, drag the gadget to a new location. Step 2: Create, edit, or delete pages Important: There’s no limit to the number of pages you can have in one blog. 

How to Make a Blog - Quick & Easy!

Image